
Push Notifications / Site Inbox
Here is the guide to implement the JS and enable Push notifications on your website.
Authentication
In order to make this work, you need to have an endpoint at your side which purpose is to validates the user session id (sid). This sid will be porivded when initializing the intergration.
Read more here about that auth endpoint / sid validation
Push Notifications
Make sure you have authenticated / initialized the integration. Read about that here
Site Inbox Solution
(Added in version 1.1)
Fasttrack CRM provides Push notifications, the Site Inbox solution will further enhance this integration with possibility to have an inbox on site with messages received.
If you want to enable the Fasttrack CRM Inbox here is how it can be implemented.
Parameters
Fasttrack CRM will require a few options to be set for the inbox to run: Here is all parameters that the Fasttrack CRM Integration / Inbox accepts.
| Name | Options / Type | Description | Default value | Required |
|---|---|---|---|---|
window.sid | String | Id used for authenticating against Fasttrack API. | Yes | |
window.fasttrackbrand | String | Fasttrack short code version of your brand name. You will get this from your Fasttrack contact person. | Yes | |
window.fasttrack.integrationVersion | 1.0 / 1.1 | Sets the version of the integration script. Use version 1.1! | 1.0 | Yes |
window.fasttrack.autoInit | Boolean | When set to false, script will not be invoked automatically. It has to be manually initialized in the developer console by running window.FasttrackCrm.init();. | false | No |
window.fasttrack.enableEventTracking | Boolean | Makes Fasttrack CRM tracking functions available. | true in 1.0. false in 1.1 | No |
window.fasttrack.enablePendingRewards | Boolean | Makes Fasttrack CRM pending rewards functions available. | true in 1.0. false in 1.1 | No |
window.fasttrack.enableCrmIntegration | Boolean | Makes Fasttrack CRM functions available. | true in 1.0. false in 1.1 | No |
window.fasttrack.inbox.enable | Boolean | Enables inbox functionality. Only available from version 1.1 and up. | false | No |
window.fasttrack.inbox.badgeId | String | ID of HTML element in your DOM. Will recieve text containing amount of unread messages. Element will be hidden if the unread count is zero. | null | No |
window.fasttrack.inbox.navBarLogo | String | URL to image (logo) that should be displayed in top left corner of inbox. | https://www.example.com/logo.png | No |
window.fasttrack.inbox.contactEmail | String | Email address for and support purposes. | info@example.com | No |
window.fasttrack.inbox.termsAboveButtons | Boolean | Some markets require to show terms above CTA Buttons. If this is set to true, that happens. | false | No |
window.fasttrack.inbox.closeModalOnFogClick | Boolean | If enabled (set to true) you will be able to close the inbox modal when clicking outside the modal on the overlay / fog. | false | No |
window.fasttrack.translations.recieved | Boolean | Translation used in inbox UI. | Recieved: | No |
window.fasttrack.inbox.validUntil | String | Translation used in inbox UI. | Valid until: | No |
window.fasttrack.inbox.questionsTop | String | Translation used in inbox UI. | Questions? Mail us at | No |
window.fasttrack.inbox.questionsShort | String | Translation used in inbox UI. | Questions: | No |
window.fasttrack.inbox.deleteMessagePrompt | String | Translation used in inbox UI. | Are you sure you want to delete this message? | No |
window.fasttrack.inbox.inboxEmpty | String | Translation used in inbox UI. | There is currently no messages in your inbox | No |
window.fasttrack.inbox.readMore | String | Translation used in inbox UI. | Read more | No |
Examples & debugging
This is a full example of how the inbox integration script should look like in production on your site:
<script>
  var sid = 'xx-xx-xx-xx'; // REPLACE THIS!
  window.fasttrackbrand = '{brand}'; // REPLACE THIS!
  window.fasttrack = {
    integrationVersion: 1.1,
    autoInit: true,
    enableEventTracking: false,
    enablePendingRewards: false,
    enableCrmIntegration: false,
    inbox: {
      enable: true,
      badgeId: "#some-element-id", // REPLACE THIS!
      navBarLogo: "https://www.example.com/logo.png", // REPLACE THIS!
      contactEmail: "info@example.com", // REPLACE THIS!
      termsAboveButtons: false
    },
      translations: {
      recieved: 'Recieved:',
      validUntil: 'Valid until:',
      questionsTop: 'Questions? Mail us at',
      questionsShort: 'Questions:',
      deleteMessagePrompt: 'Are you sure you want to delete this message?',
      inboxEmpty: 'There is currently no messages in your inbox',
      readMore: 'Read more'
    }
  };

  var fastTrackCrmScript = document.createElement('script');
  fastTrackCrmScript.async = true;
  fastTrackCrmScript.onload = function () {
    new window.FastTrackLoader();
  }
  fastTrackCrmScript.src = "https://crm-lib.fasttrack-solutions.com/loader/fasttrack-crm.js";
  document.body.appendChild(fastTrackCrmScript);
</script>
Inbox button & badge
You can have a menu button (or similiar) that toggles the inbox. It could have an associated badge which displays the number of unread inbox messages.
This is what the markup and css would look like:
<div id="inbox-button" onclick="window.FasttrackCrm.toggleInbox();">
  Inbox
  <!-- Put which id you want on the badge. But be
  sure to put the same id into the integration inbox
  config. Her we use 'some-element-id' as example: -->
  <span id="some-element-id">3</span>
</div>

<style type="text/css">
div#inbox-button {
  color: black;
  border-radius: 4px;
  background-color: lightblue;
  display: block;
  padding: 10px;
  min-width: 100px;
  max-width: 100px;
  font-family: Arial, Helvetica, sans-serif;
  text-align: center;
  font-size:16px;
  display: flex;
  align-items: center;
  justify-content: center;
}

span#some-element-id {
  background-color: white;
  border-radius: 15px;
  min-width: 10px;
  padding: 4px;
  height: 10px;
  line-height: 13px;
  font-size: 12px;
  margin-left: 10px;

  /* This one will be setted to display: none inline
  when there is no messages: */
  display: block;
}
</style>
Visit this page to see a live demo of the Inbox functionality.
Using Google Tag Manager for inserting FT CRM Scripts
If you want to use your Google Tag Manager for injecting the Site Integration Script / Inbox Script on your site you can do that.
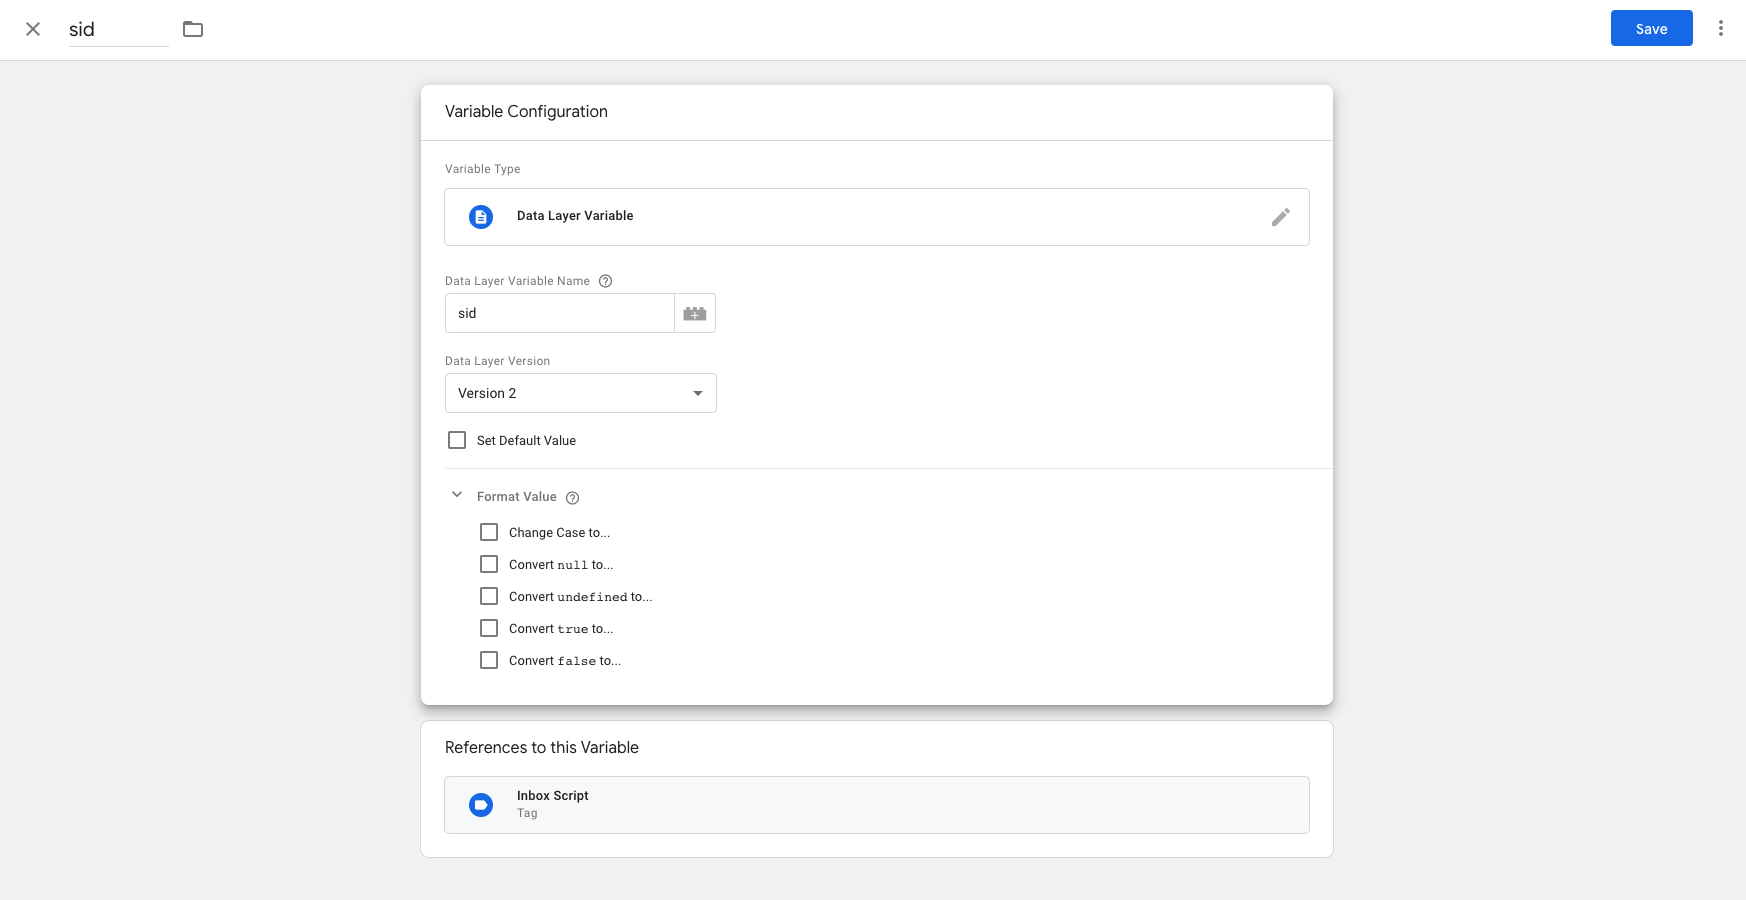
1. Create a new user-defined variable in GTM
2. Create a new trigger
Create a "Page View - DOM Ready" trigger. Add additional filters such as url if you want. But it is important that the trigger is based on page vid AND DOM Ready.
3. Create a new tag with following code inside
Don't forget to replace your own values
<script>
  window.sid = "{{sid}}"; // REPLACE THIS ONE WITH THE GTM VARIABLE YOU ARE USING
  window.fasttrackbrand = 'islandluck';
  window.fasttrack = {
    integrationVersion: 1.1,
    autoInit: true,
    enableEventTracking: false,
    enablePendingRewards: false,
    enableCrmIntegration: true,
    inbox: {
      enable: true,
      badgeId: '#inbox-badge', // REPLACE THIS ONE WITH YOUR OWN VALUES (OR REMOVE IT IF NOT NEEDED)
      navBarLogo: 'https://via.placeholder.com/150x150', // REPLACE THIS ONE WITH YOUR OWN VALUES (OR REMOVE IT IF NOT NEEDED)
      contactEmail: 'info@example.com', // REPLACE THIS ONE WITH YOUR OWN VALUES
      termsAboveButtons: false
    },
    translations: {
      recieved: 'Recieved:',
      validUntil: 'Valid until:',
      questionsTop: 'Questions? Mail us at',
      questionsShort: 'Questions:',
      deleteMessagePrompt: 'Are you sure you want to delete this message?',
      inboxEmpty: 'There is currently no messages in your inbox',
      readMore: 'Read more'
    }
  };

  var fastTrackCrmScript = document.createElement('script');
  fastTrackCrmScript.async = true;
  fastTrackCrmScript.onload = function () {
    new window.FastTrackLoader();
  };

  // fastTrackCrmScript.src = 'https://crm-lib-staging.fasttrack-solutions.com/loader/fasttrack-crm.js'; // THIS ONE IS FOR STAGING
  fastTrackCrmScript.src = 'https://crm-lib.fasttrack-solutions.com/loader/fasttrack-crm.js';
  document.body.appendChild(fastTrackCrmScript);
</script>
Make the tag fire on your "Page View - DOM Ready" trigger.
3. Insert the script in your HTML / DOM
You might already be adding dataLayer variables. If you do so, please append the dataLayer with your sid variable (the custom variable you created in step 1) and add the corresponding value.
If you are not already adding dataLayer variables to GTM you need to include the following before initiating the Google Tag Manager on your page:
<script>
  window.dataLayer = window.dataLayer || [];
  window.dataLayer.push({
    'sid': 'XXX' // REPLACE THIS WITH A PROPER SID!
  });
</script>

<!-- HERE WE THEN INITIATE GOOGLE TAG MANAGER SCRIPT! -->
And you're done! 👌
Debugging
Test user:
sid: 99999999-9999-9999-9999-999999999999-9999
UserId: -9999
If you want to debug in staging or production environment, you could deploy above script to production with the variable autoInit set to false.
With that done, you can manually enable the inbox integration by putting this into the browser developer console:
window.FasttrackCrm.init();
After doing that the inbox integration will initiate with the sid variable defined. You can change the sid in runtime by setting the sid in the developer console before initiating it, like this:
window.sid = "99999999-9999-9999-9999-999999999999-9999";
window.FasttrackCrm.init();
Sending demo message
You can send a demo message from the developer console (script has to be initialized first!):
window.FasttrackCrm.demoMessage();
If you want to you can also set the data in the message yourself, like this:
// Event property can either be 'message' or 'shoutout'
window.FasttrackCrm.demoMessage({
  Event: 'message',
  Title: 'Title',
  Message: 'Message body',
  CTAButtonLink: 'https://www.google.com',
  CTAButtonText: 'Primary button',
  ImageUrl: 'https://via.placeholder.com/900x380',
  CTAButton2Link: 'https://www.google.com',
  CTAButton2Text: 'Secondary button',
  Expires: '2020-05-05 10:00:00',
  DisplayType: 'push', /* Can be 'silent' or 'push'. Only used when Event is 'inbox'. */
  PreviewText: 'Preview text',
  FooterText: 'Footer text',
});
Front end inbox actions
If you want to toggle the visibility of the inbox in the front end of your site, you can add this action on your inbox button in the main menu for example:
window.FasttrackCrm.toggleInbox();
Override Styles
If you want to override the styles in the inbox, all styles should be wrapped within the css id #fasttrack-crm. That protects your sites css and allows you to easy target css classes in the inbox.
Place a block of css above the invocation of the integration script.
Example:
<style type="text/css">
#fasttrack-crm .cta-button {
  background-color:red;
  color:black;
}

#fasttrack-crm .cta-button.secondary {
  background-color:lime;
  color:white;
}
</style>
API Endpoints
If you want you can build the front end for the inbox yourself. Here is the endpoints needed to do that:
GET /Notifications/v2/user-notifications?{filters}
Lists all notifications for authenticated user. Use the querystring parameters to filter notifications:
| Key | Values | Description |
|---|---|---|
| unread-only | true / false | Only return unread notifications |
Response:
{
  "Data": [
    {
      "MessageId": 123,
      "UserId": 123,
      "Event": "message",
      "Title": "Title",
      "Message": "<div>This is message body</div>", // Can contain HTML
      "PreviewText": "Preview text", // Cannot contain HTML
      "FooterText": "<div>This is footer text</div>", // Can contain HTML
      "Data": {}, // Extra fields for your usage
      "CTAButtonLink": "https://www.example.com",
      "CTAButtonText": "Click here!",
      "CTAButton2Link": "https://www.example.com",
      "CTAButton2Text": "Read more!",
      "ImageUrl": "https://www.example.com/image.jpg",
      "IsRead": true,
      "Date": "2019-02-14 13:07:00",
      "Expires": "2019-12-12 12:00:00"
    },
    ...
  ],
  "Success": true,
  "Errors": []
}
GET /Notifications/v2/user-notification/:ID
Returns notification for given id
Response:
{
  "Data": {
      "MessageId": 123,
      "UserId": 123,
      "Event": "message",
      "Title": "Title",
      "Message": "<div>This is message body</div>", // Can contain HTML
      "PreviewText": "Preview text", // Cannot contain HTML
      "FooterText": "<div>This is footer text</div>", // Can contain HTML
      "Data": {}, // Extra fields for your usage
      "CTAButtonLink": "https://www.example.com",
      "CTAButtonText": "Click here!",
      "CTAButton2Link": "https://www.example.com",
      "CTAButton2Text": "Read more!",
      "ImageUrl": "https://www.example.com/image.jpg",
      "IsRead": true,
      "Date": "2019-02-14 13:07:00",
      "Expires": "2019-12-12 12:00:00"
  },
  "Success": true,
  "Errors": []
}
DELETE /Notifications/v2/user-notification/:ID
Marks specific notification as deleted. Deleted notifications won't be returned in endpoint for getting all notifications or endpoint for getting a specific notification.
Response:
{
  "Data": null,
  "Success": true,
  "Errors": []
}
POST /Notifications/MarkNotificationAsRead
Marks notification as read. Be aware this is a POST request. So you have to provide a post body looking like this:
Request:
{
	"MessageId": 123
}
Response:
{
  "Data": true,
  "Success": true,
  "Errors": []
}
← Pending Bonus Pusher →